Correct operation of PCR plate sealing film
Correct operation of PCR plate sealing film
Presumably, everyone has the experience of "filming", that is, sealing the 96-well PCR plate. Make sure that the sealing film is closely attached to the 96-well plate to prevent the liquid from evaporating, so as to ensure the smoothness of the experiment. Today we will share, how to properly seal the PCR plate.
Step 1: Do the prep work
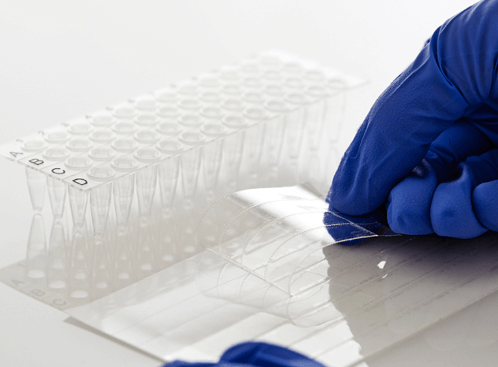
Attach the sealing film to the plate. Remove the single sealing film from the ziplock bag and reseal the zip lock bag to maintain an enzyme-free environment. As shown in the picture below, keeping the backing side up, hold the sealing film and slowly peel off the backing along the tangent.
Then, stick one end of the adhesive side of the sealing film on the board, and master the distance and angle to avoid subsequent sticking. In the process of pasting, one end is pasted, and the other end is pulled.
Note: Be sure to wear gloves
If using a sealing film for single-ended labels, remove the liner portion, then anchor the sealing film to the board so that it seals over the entire board, and continue to remove the liner. This method eliminates curling and rolling back of the sealing film
If using a product with two end labels, peel off the center liner in a continuous smooth movement. Slowly peel off the liner to minimize curling. Be careful not to touch the adhesive surface of the film.

Step 2: Lamination
Use a lamination plate to slowly scrape the sealing film so that it all seals to the plate. If there is no special lamination plate, you can find a card with a smooth edge, such as a bank card or bus card without money. The lamination step should be performed at least twice horizontally and vertically. Applying enough force (and not too much) is critical to getting a good seal. As shown in Figures A and B below, twice horizontally and twice vertically.
Scrape the lamination plate along all outer edges of the orifice plate at least twice, making sure to apply firm and constant pressure. As shown in Figures C and D above, the holes and edges should be pressed again. For good results, be patient. After the sealing film is properly sealed to the board, tear off the joint section along the tangent. When laminating the film, the other hand should stabilize the board to prevent the board from shaking violently.
Step 3: Check Results
After sealing, check the plate carefully to confirm that the film is tightly attached to the plate. Confirm the stick marks around each well, that the entire surface of the plate (including the perimeter) is sealed, and that there is no liquid on the membrane. The sealing film should not be wrinkled, if wrinkles are observed, the plate is not properly sealed.
Note that for slabs with raised edges, the sealing film may not be positioned correctly on the slab, to avoid the membrane extending up the sidewalls of the slab. Place the sealed plate for at least 10 minutes before starting the PCR experiment, the adhesion of the sealing film will increase over time. If conditions permit, centrifugation with a special centrifuge for well plates will be more effective.
Professional manufacturer of Nucleic Acid (DNA & RNA) Extraction and Analysis products PCR sealing film supplier
GENETURE is a group company,we own two factories: Ascend and Dianrun,to provide one stop solution of Nucleic Acid Extraction and Analysis,including solution for COVID-19. Geneture provides high quality and professional Nucleic Acid Extraction Reagents, Lab consumables, Real-time PCR consumables and test machines.
GENETURE main products including: Nucleic acid extraction or purification kit, Automatic nucleic acid extractor, PCR system, PCR kit, Magnetic beads, and lab consumables of 96 well deep plate, Magnetic rod comb, PCR tube, PCR plate, Pipette tips, centrifuge tubes.
If you are looking for PCR sealing film, feel free to contact us.
Email: info@geneture.com
Mobile: +86 150 1002 8687
